Tutorial: your first team session
In this tutorial, you create a session, bring in a teammate, split up the work, and let your agents build without colliding. Allow about 20 minutes.
You'll need a teammate for the steps marked with their name. If you're following along alone, you can read those steps to see what they would do.
Prerequisites
- A current version of I-IDE for you and your teammate.
- A GitHub or Google account for each of you.
- The same project open on both computers. It's easiest if you both clone the same repository.
- An AI model set up for each of you. See Set up your AI.
While you're in a session, its chat, plans and synced code are stored on our server. Read Security and data before syncing private code.
1. Sign in and turn on I-mode
- Open your project in I-IDE.
- In the top-right corner of the I-mode panel, turn on the I-mode switch.
- Select Sign in. Your browser opens the sign-in page.
- Choose Continue with GitHub or Continue with Google, approve access, and go back to I-IDE.
2. Create the session
- Select the people icon next to the I-mode switch, then New session….
- Enter a name, such as "Task reminders".
- Enter a goal, such as "Add reminders to tasks and test them". The goal helps your teammates and their agents understand the work.
- Choose You lead so that you control file sharing and task assignment, or No leader to give everyone equal access. For this tutorial, choose You lead.
- Create the session. Its name and goal appear at the top of the panel.
3. Invite your teammate
- Select the people icon, then Copy invite link.
- Send the link to your teammate through a private channel.
- Your teammate opens the link, which opens I-IDE, and signs in if asked. Their panel says they've asked to join.
- In your panel, a request appears with their email address. Check it, then select Approve.
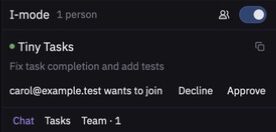
Your teammate joins as soon as you approve, and the people count at the top of the panel goes up.
Don't recognize the email address? Select Decline. That account can't ask to join this session again.
4. Talk through the plan
- Open the Chat tab and make sure Send to is set to Team.
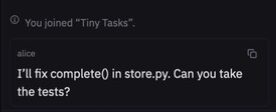
- Say what you're building and who is good at what. For example: "I know the storage code, so I'll take that. Can you do the form and tests?"
- Press Return to send. Your teammate sees the message right away.
5. Assign the work
- Open the Tasks tab.
- Select Assign tasks. I-IDE reads your discussion and splits the work by role, with one owner per task and files kept apart.
- Review the task board with your teammate. Each of you selects Start with my agent on a task you own.
Starting a task hands it to your Agent Panel on the left. Its edits show up in the I-mode panel so you can sync them.
6. Let your agents work
You can also direct your AI from the I-mode panel:
- Set Send to to My AI.
- Choose Agent mode at the bottom of the panel.
- Describe the change, such as "Add a remind_at field to Task, and a method that lists tasks that are due."
- When the agent wants to run a command, a card appears. Select Run or Deny.
If your agent and your teammate's agent reach for the same function, the second one steps back and the chat shows a Collision avoided message. Both can keep working in other functions of the same file. Learn more in Function claims.
7. Sync your agent's changes
- When your agent finishes, a banner offers Sync to team.
- Review the changes in your editor.
- Select Sync to team. Your teammate's copy of the file updates.
8. Review the session
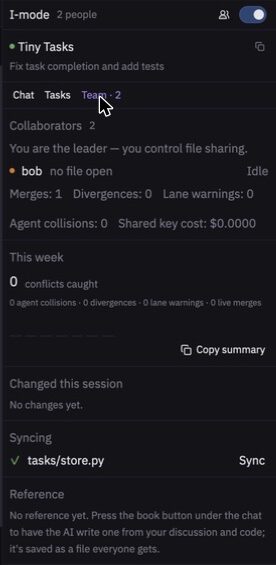
Open the Team tab to see who is here and what they're doing, the conflicts caught this week, what changed this session, and which files are syncing.
9. Finish up
Commit your work with Git as usual. I-IDE doesn't replace Git. When you're done, select the people icon, then Leave session.