The I-IDE interface
The I-IDE window has an editor in the middle, panels on each side, and a status bar along the bottom. This page explains each part.
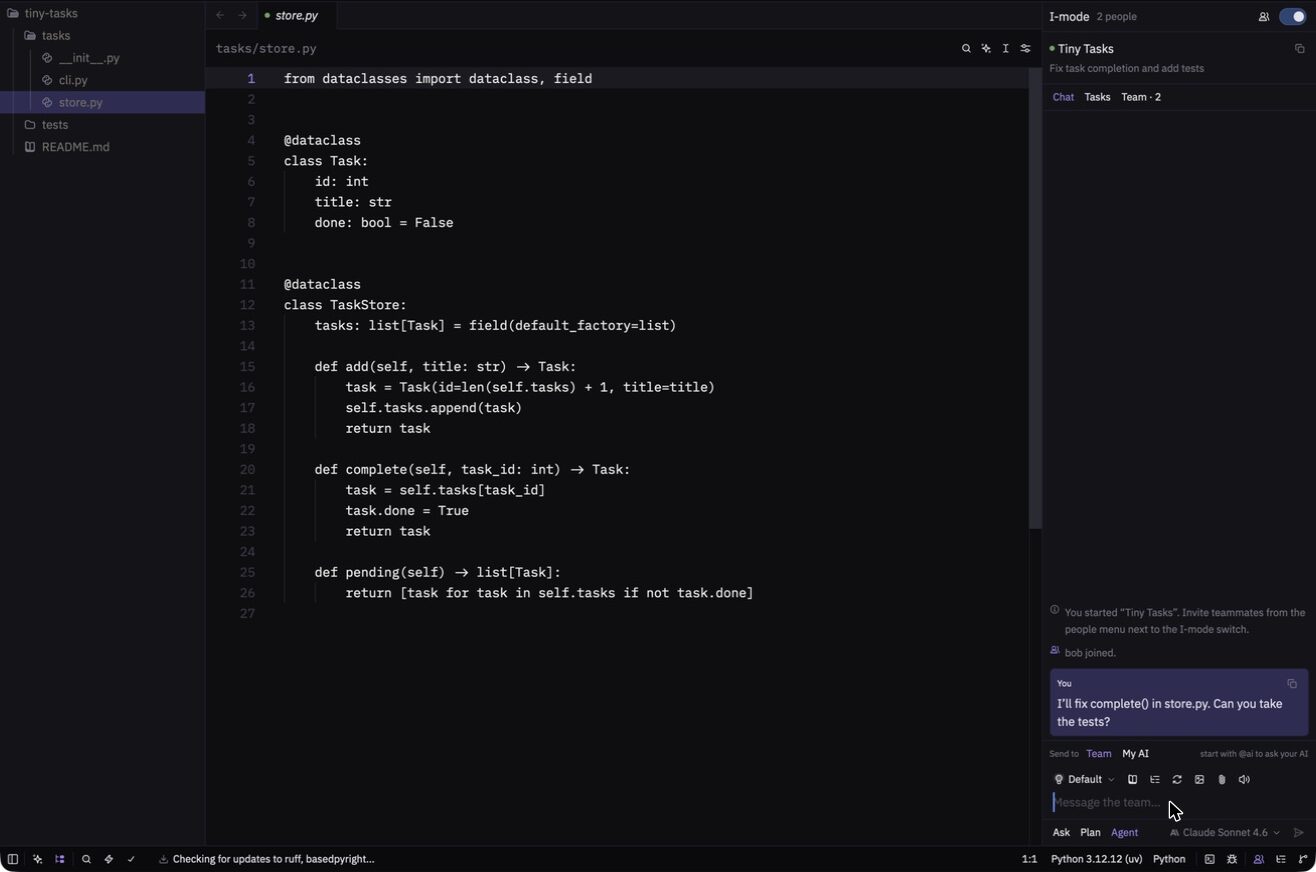
Main areas
- Project Panel: your project's files and folders, on the left. Toggle the left side with Cmd+B.
- Editor: where you read and change code. Each open file gets a tab.
- I-mode panel: sign-in, team sessions, chat and your AI, on the right. Toggle the right side with Cmd+Alt+B.
- Bottom dock: the terminal and other tools. Toggle it with Cmd+J.
- Status bar: buttons for panels, your cursor position and the current language.
The I-mode panel
From top to bottom, the panel has these parts during a session:
- Header: the words I-mode, how many people are present, the people menu and the I-mode switch.
- Session title: the session name and goal, with a button that copies the invite link.
- Tabs: Chat, Tasks and Team.
- Send to: choose whether your message goes to your Team or My AI.
- Tool row: effort level and the buttons described in Team chat.
- Message box: where you type.
- Mode and model: Ask, Plan or Agent, and which AI model to use.
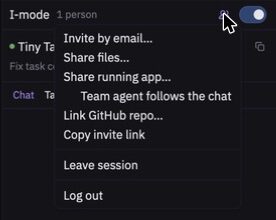
The people menu
Select the people icon next to the I-mode switch to invite people, share files or your running app, and leave a session. If you're not in a session, it's where you create or join one.
The Command Palette
Press Cmd+Shift+P and start typing what you want to do. The palette lists matching commands with their shortcuts, which makes it the fastest way to learn the app.